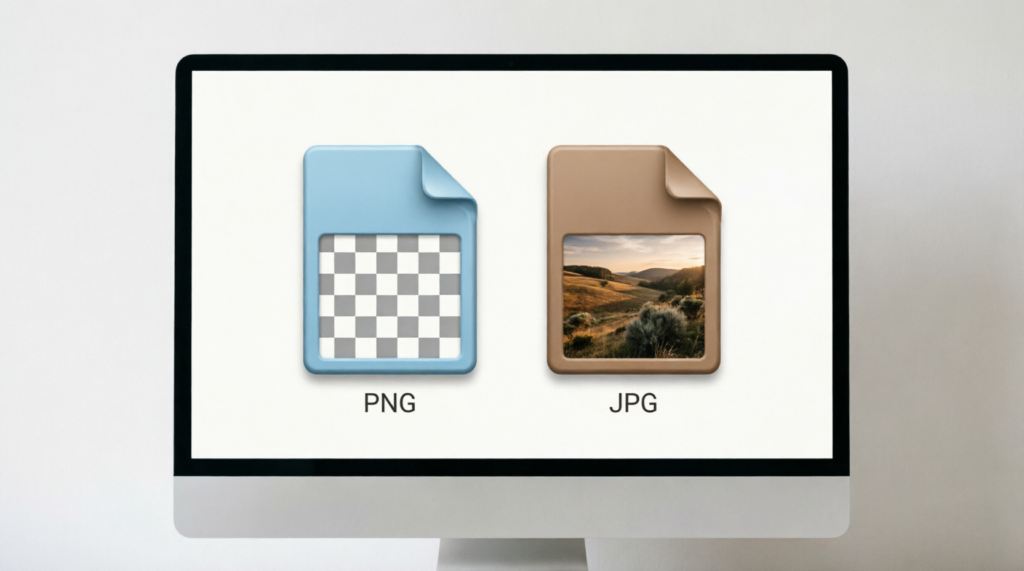
If you’ve tried uploading a photo to a website that only accepts JPG files, or perhaps you caught yourself in a staring contest with that PNG file that’s too big to be attached to your email, the frustration is common. Converting PNG to JPG is up there with the most common image tasks for Mac users like you. Seems plain easy, but you’d be surprised how much time you’d spend on this task. But when you know exactly what to do, it takes less than a minute.
We’ll go over all you need to breeze through this task. First, you’ll learn the difference between the two image file formats, then why some websites want you to make the switch, and we’ll draw a clear, step-by-step walkthrough that shows how you can change PNG to JPG on Mac using a free online tool. No tricky technical settings, no software downloads.
PNG vs JPG: What’s the Difference?
In this article, we’ll go over the surface differences, but if you want a deep dive, check out AhaConvert’s comprehensive guide on the difference between PNG and JPG. Let’s continue to the differences.
What is PNG?
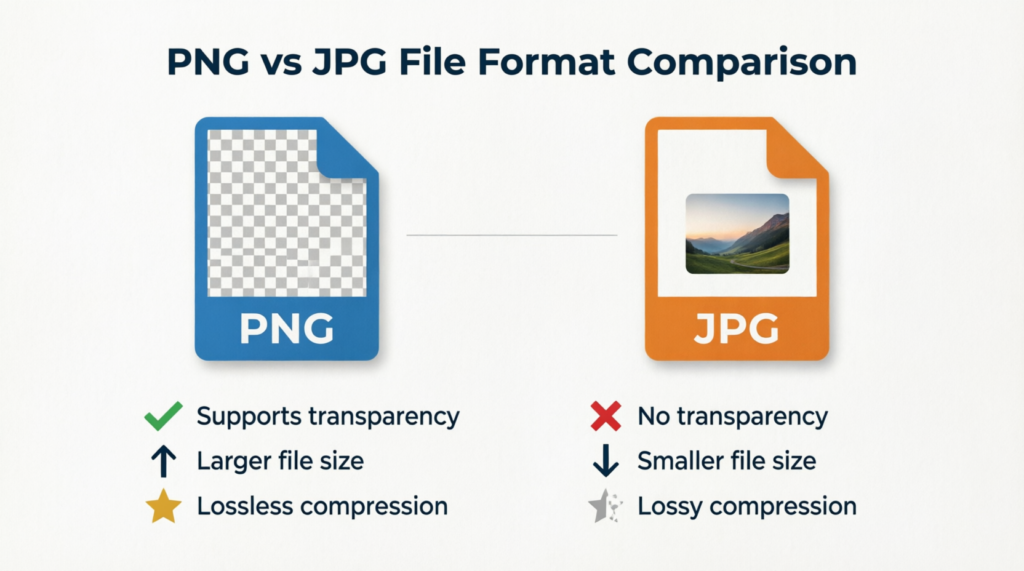
We’ve come to know PNG as the transparent image format. But what does “PNG” actually mean? PNG is short for Portable Network Graphics; it’s a lossless image format. That means every pixel is preserved exactly as it was originally captured with no image quality lost during the compression process. PNG supports transparency; you can edit it so that parts of the image are fully or partially transparent. This is why it’s the designer’s favorite format for logos, UI graphics, and even screenshots. The major drawback, though, is in its filesize. PNG images are normally larger than JPGs
What is JPG?
JPG is one of the OGs of digital image formats. It’s the dominant photo format on the web. It’s originally known as JPEG, which stands for Joint Photographic Experts Group. It uses lossy compression technology. When you save an image as JPG, the format discards some image data so as to achieve a smaller file size (its strong suit). At moderate compression levels, the loss in quality is barely noticeable, especially in photos. You’ll find it in email and social media platforms because it strikes that thin balance between image quality and file size.
What’s the Difference?
The table below highlights the key differences;
| Feature | PNG | JPG |
|---|---|---|
| Compression | Lossless | Lossy |
| Filesize | Larger | Smaller |
| Transparency | Yes | No |
| Best For | Logos, Graphics, Screenshots | Photos, Web Images |
| Re-save Quality | No Quality Loss | Slight degradation each save |
| Universal support | Yes | Yes |
To summarise: Use PNG when you’re going for precision; Use JPG when you’re tight on file size.
Why Should You Consider Converting PNG to JPG
There are many practical situations where you, as a Mac user, could convert PNG to JPG, and it’d make sense:
• Smaller file sizes: JPG files are typically 50-80% lighter than their equivalent PNG files. A 40 kb difference in file size may seem intangible, but it makes all the difference when you are sending emails with picture attachments, uploading to a Content Management System like WordPress, or sharing picture files with friends via chat apps.
• Broader Platform Compatibility: Some websites, forms, and apps only accept the JPG file format. Having a reliable convert PNG to JPG workflow in place will enable you to never be caught off guard because of an unexpected format condition.
• Faster Web Performance: Want faster loading websites? Always opt for JPG. Its smaller size loads faster in your web browser. It’s an open industry secret that web administrators are switching from PNG to JPEG to drastically improve page load speed and help web pages rank better in search engines.
• Freeing Up Storage: If your MacBook is loaded with high-resolution PNG screenshots or graphics, converting older files to JPGs can free up a large chunk of disk space. What’s great is you won’t notice a visible loss in image quality.
• Social Media Uploads: Most social media platforms automatically compress the images you upload. Now, starting with a JPG gives you more control over the final appearance and thus saves you that double compression loss that happens when they eventually convert images to save space.
You need to always be in control of your files and know when to convert from PNG to does just that. You stay in charge of the quality, and you stay in charge of the storage space the pictures occupy. The key is having a fast, reliable, and trustworthy tool that handles the conversion.
How to Convert PNG to JPG on Mac
▏When to Use an Online PNG to JPG Converter
Mac users have several options to choose from when they want to convert images. There’s a built MacOS in option, the preview app, and there are third-party desktop applications as well. However, when you are working on your browser, and you hit a bottleneck and a website you’re using demands that you convert from one image format to another, switching out of your browser app may be too much. So an online, on-browser, PNG to JPEG converter is the most practical choice, especially for quick jobs or batch conversions. It’s plug and play. There is nothing to install, and it works on any Mac regardless of the MacOS version, and best of all, it’s completely free – if you need to convert one image or fifty, an online converter handles both scenarios without any setup.
▏Step-by-Step: Converting PNG to JPG Using a PNG to JPG Converter
AhaConvert is a free, browser-based image converter that processes conversions quickly and securely. It supports batch uploads, doesn’t require an account, and automatically deletes uploaded files after 24 hours, ensuring your privacy is protected. Here’s how you use it:
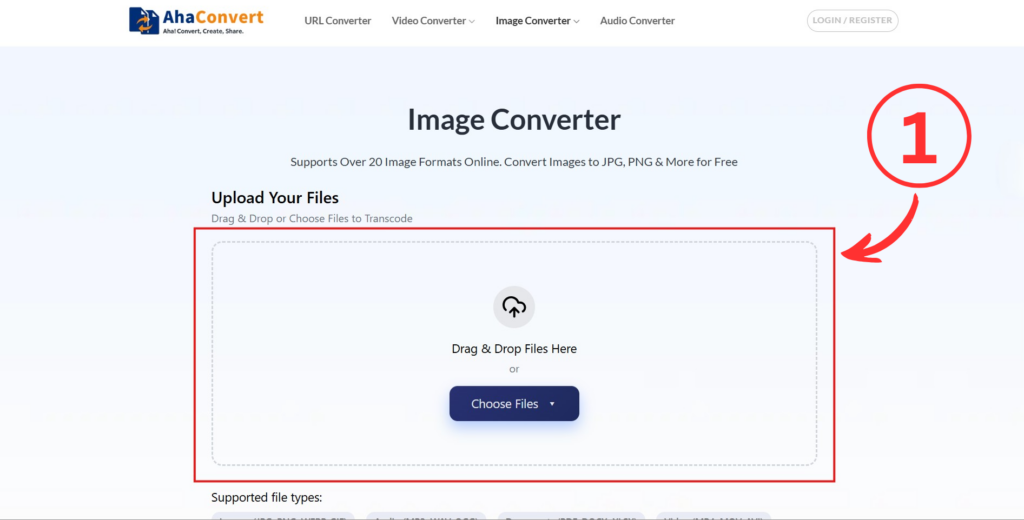
Step 1: Open AhaConvert in Your Browser.
Navigate to AhaConvert Image Converter on your Mac. The tool opens directly in your browser, no registration required, no subscription, and no software download required.
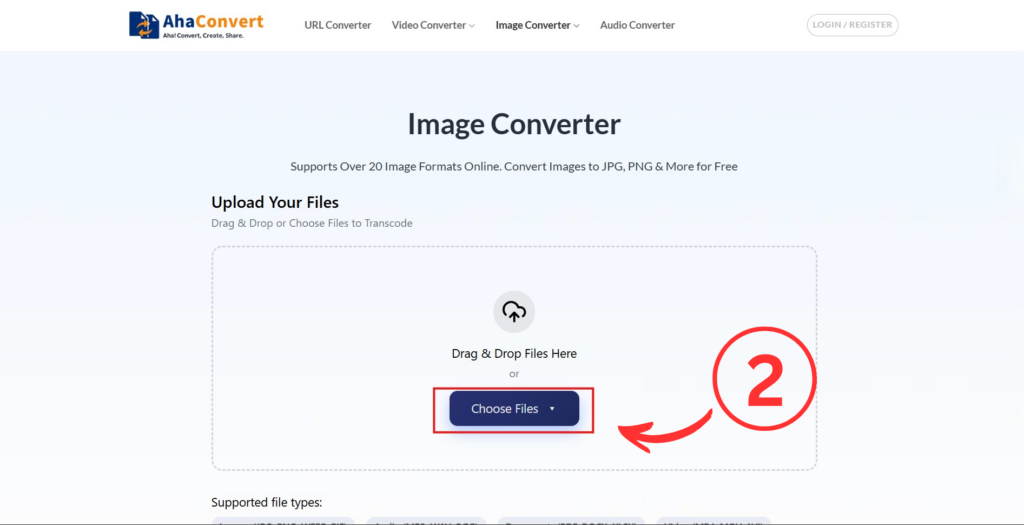
Step 2: Upload Your PNG File
Click the “Choose Files” button and select the PNG file (or files) you want to convert. You can drag and drop images directly into the upload area. AhaConvert supports batch uploads, so feel free to add as many files as you’re willing to at once.
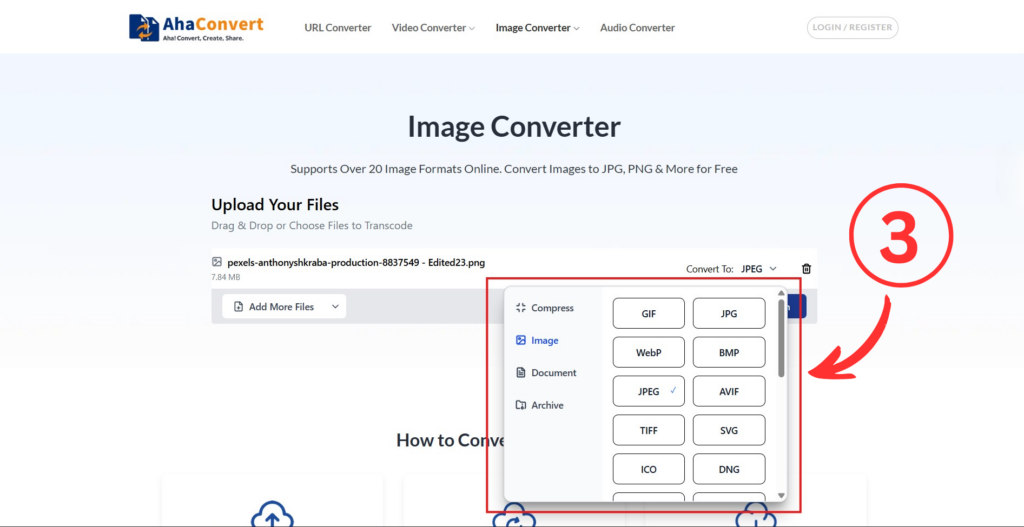
Step 3: Select JPG as the Output Format
After uploading, locate the output format selector and choose JPG from the dropdown menu. AhaConvert’s smart technology will automatically configure conversion settings, so you won’t need to make any manual adjustments unless you’re interested in fine-tuning the quality.
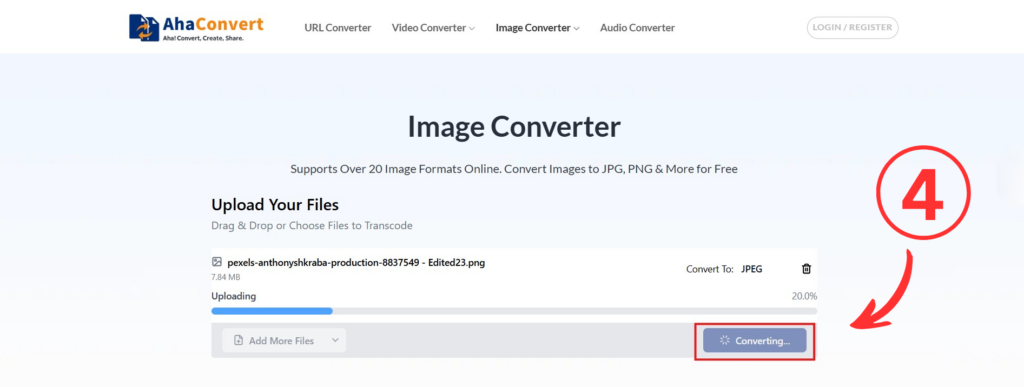
Step 4: Start the Conversion
Click the “Convert” button to begin. AhaConvert processes files one by one automatically, so even large batch uploads require no further input from you. Converting the image typically takes only a few seconds for your average-sized image.
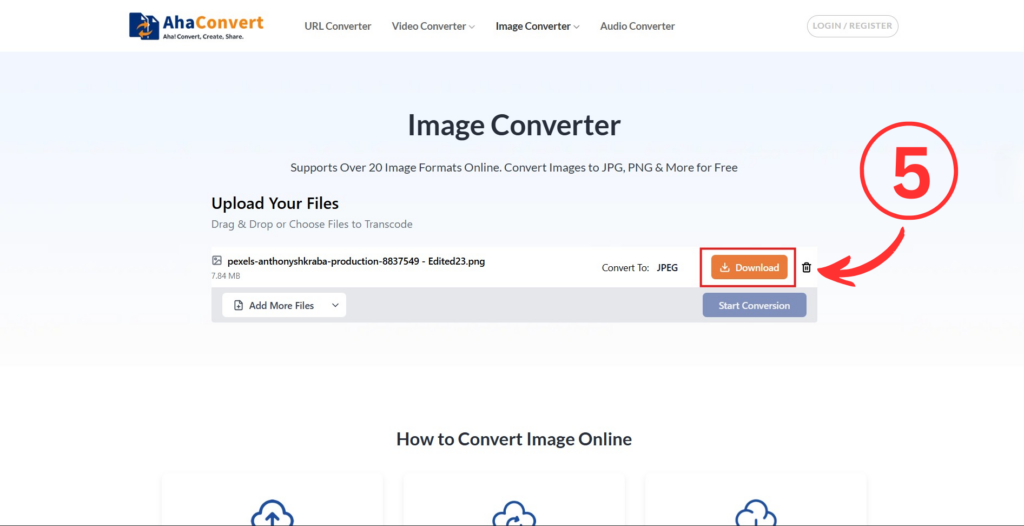
Step 5: Download your JPG file
When the conversion process is completed, a download button will appear next to each file. Click it to save the JPG to your Mac. For batch conversions, you can download all files together as a ZIP archive.
That’s pretty much it. It’s as simple and intuitive as it gets. This entire process takes about a minute for most file types, with the added benefit of your original PNG file untouched and safe on your Mac.
Frequently Asked Questions
1.Can I batch convert multiple PNG files to JPG on Mac?
Yes. AhaConvert supports batch conversion, allowing you to upload and convert multiple PNG files to JPG at once. This feature is useful when working with large image libraries or project folders.
2.Can I keep transparency when converting PNG to JPG?
Sadly, no. JPG does not support transparency. Any transparent areas in the original PNG file are replaced with a solid color background, usually white. If keeping the transparency is key to your project, you are better off keeping the original PNG or converting to a format like WebP, which supports both transparency and compression.
3.Does converting PNG to JPG reduce image quality?
JPG uses lossy compression, so there’ll be a minor loss in quality. However, at standard settings, the difference is barely noticeable to the naked eye, especially for photographs. For graphics, on the other hand, you may notice slight softening of the sharp text and fine lines when compression levels are high. AhaConvert’s high-quality converter will minimize this.
4.Are online PNG-to-JPG converters safe to use?
All the best online tools take security seriously. AhaConvert is no exception. AhaConvert encrypts all file transfers with 256-bit SSL and automatically deletes uploaded files within 24 hours. We, however, recommend you follow standard online security measures – never upload sensitive or confidential images and stick to well-established platforms with clear privacy policies.
5.Can I use a PNG to JPG converter on my Mac without downloading anything?
Absolutely. Online Converters like AhaConvert run entirely in your web browser and require no software installation on your computer. Just open the URL on your Mac, upload your PNG, choose JPG as the output, and download the result. It works on any browser and any version of macOS.
Conclusion
Converting from PNG to JPG is a short task that makes miles of difference in digital outcomes. You could be shrinking files for email, fulfilling platform requirements, or improving load times on your website. Working from your Mac, the process couldn’t be more straightforward, especially when you’re using a reliable converter like AhaConvert. It’s free, works directly in your browser, and easily handles converting tasks from single files to large batch file conversions without much hassle. For the next time you need to convert PNG to JPG on your Mac, overlook installing software and give it a try, you’d be delighted by the result.